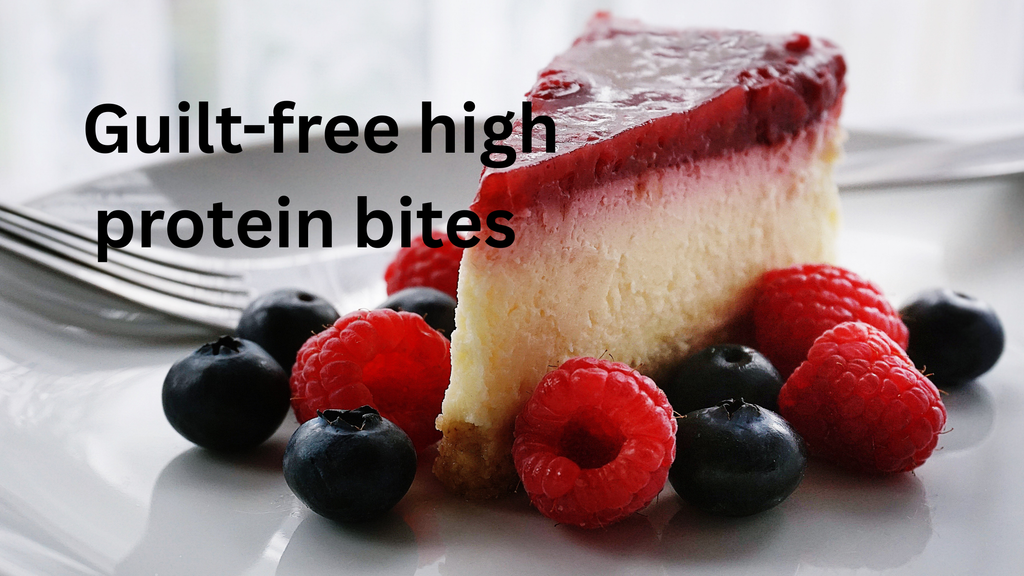
When you want to eat something good, delicious, healthy, and protein-packed dessert, make cottage cheese cheesecake. It’s made with simple ingredients at home and is very delicious. It has smooth and creamy texture and the light vanilla flavor make it even more perfect. This cottage cheese cheesecake is a perfect dessert for any gathering or party, you must try it.
why you love this this recipe
High in protein: It has cottage cheese and eggs, which keep you full so you don’t get hungry quickly.
Lower in fat & calories: It tastes like regular cheesecake, but with much lower calories because it uses no heavy cream.
Great post-workout snack: It has calcium and protein, which helps keep your bones and muscles strong.
Light on your stomach: This cottage cheese cheesecake satisfies your sweet tooth without making you feel heavy or bloated.
Ingredients for High-Protein Cottage Cheese Cheesecake
This recipe makes one 8-inch cheesecake.
For the Cheesecake Base
100 g (1 cup) digestive biscuits or graham crackers, crushed
40 g (3 tbsp) unsalted butter, melted
1 tbsp honey or maple syrup, optional
For the Cheesecake Filling
500 g (2 cups) full-fat or low-fat cottage cheese
200 g (¾ cup) plain Greek yoghurt
3 large eggs, at room temperature
75 g (⅓ cup) granulated sugar or your preferred sweetener
1 tsp vanilla extract
1 tbsp lemon juice
1 tbsp cornflour (cornstarch)
¼ tsp salt
Optional Toppings
100 g (½ cup) fresh strawberries or blueberries
1 tbsp honey
A little lemon zest
How to Make High-Protein Cottage Cheese Cheesecake
Step 1: Prepare the Cheesecake Base
First, preheat the oven to 325°F or 160°C. Grease an 8-inch springform cake tin and line it with baking paper. Make digestive biscuit crumbs and mix them well with melted butter. Press the mixture into the base of the cake tin using a spoon and bake for 8 to 10 minutes. Remove from the oven and let it cool slightly.
Step 2: Blend the Cottage Cheese
Put the cheese into a blender or food processor and blend it well. Use a spatula to scrape down the sides so no small pieces are left behind, then blend again until the texture is completely smooth. This step is very important to get rid of any lumps so your cheesecake turns out nice and creamy.
Step 3: Prepare the Cheesecake Filling
Blend the cottage cheese, Greek yogurt, egg, sugar, vanilla extract, lemon juice, cornflour, and salt until smooth and well combined. once you add the egg, don’t over-blend it. Too much air gets trapped, which makes the cheesecake puff up too high in the oven and crack as it cools down.
Step 4: Fill the Cake Tin
Pour the cheesecake filling onto the biscuit base. Tap the cake tin on the kitchen counter two or three times to remove any air bubbles in the filling . Smooth the top of the cheesecake with the help of spatula.
Step 5: Bake the Cheesecake
Bake the cheesecake in a preheated oven for 50 to 60 minutes. The edges of the cheesecake should be set, while the center should wobble slightly when shaken. If the top of the cheesecake browns too quickly, cover it loosely with aluminum foil.
Step 6: Cool Slowly
Turn off the oven and leave the cheesecake inside for 20 minutes. Leave the oven door slightly ajar. Then, remove the cheesecake from the oven and let it cool completely at room temperature. Once cooled, cover the cheesecake and refrigerate for at least two hours. For even better results, refrigerate it overnight.
Step 7: Add Toppings and Serve
Gently remove the cheesecake from the springform tin. Toping it with some fresh berries, blueberries, or a light drizzle of honey. Slice it up carefully, and your high-protein cheesecake is ready to serve!
Pro Tips for the Best Cottage Cheese Cheesecake
1. Blend the Cottage Cheese Until Smooth
Don’t skip this step! Blending the cottage cheese thoroughly is the secret to a super creamy cheesecake and keeps the texture completely smooth instead of grainy.
2. Use Room-Temperature Ingredients
Make sure your eggs and yogurt are at room temperature before mixing. It helps everything blend smoothly and prevent from lumps.
3. Avoid Overbaking
When you pull the cheesecake out of the oven, the center should still wobble a bit. It will set as it cools down
4. Chill Before Slicing
Put the cheesecake in the fridge to let the filling firm up—it makes slicing it so much easier
5. Make It Without the Biscuit Base
For a low-carb cheesecake, skip the crust and bake the filling directly in your prepared tin. Want it gluten-free? Just swap the biscuits for almond flour mixed with melted butter.
Storage and Meal Prep
Fridge: Store it in an airtight container for up to 4 days.
Freezer: Wrap individual slices tightly and freeze them for up to 2 months.
Thawing: Move frozen slices to the fridge the night before you want to eat them.
Tip: For the best texture, take the chilled cheesecake out of the fridge about 10 minutes before serving.”
Serving Suggestions
This creamy cottage cheese cheesecake tastes delicious on its own, but you can also serve it with:
Fresh strawberries, raspberries, or blueberries
A spoonful of Greek yoghurt
A light drizzle of honey or maple syrup
A cup of black coffee or cappuccino
A cup of green tea or herbal tea
For a balanced dessert, pair a slice with fresh fruit and enjoy it after lunch or dinner.
Frequently Asked Questions
Does cottage cheese cheesecake taste like cottage cheese?
Nope! Once blended and baked, the cottage cheese gets super smooth and mild. Adding vanilla, lemon juice, and sweetener makes it taste just like a classic cheesecake.
Is cottage cheese cheesecake high in protein?
Yes! One slice has about 15 grams of protein. The exact amount might change slightly depending on the specific ingredients you use.
Can I make this cheesecake without a blender?
A food processor is a great alternative to a blender. If you have neither, pressing the cottage cheese through a fine sieve works too, though it won’t be quite as smooth
Can I make cottage cheese cheesecake ahead of time?
Yes! This recipe is actually ideal for making ahead of time since it needs plenty of time to chill. You can easily make it a day in advance, leave it in the fridge, and just pull it out when you’re ready to serve.
Disclaimer
This recipe is provided for general informational and educational purposes only. Nutritional values are estimates and may vary depending on the ingredients and brands used. This recipe is not intended to diagnose, treat, cure, or prevent any medical condition. Individual nutritional needs vary, so consult a qualified healthcare professional or registered dietitian for personalised dietary advice.